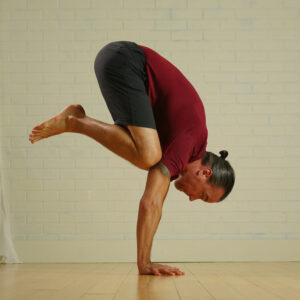
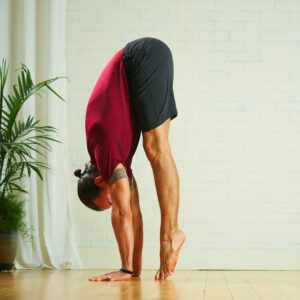
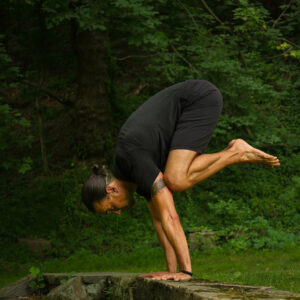
Crow Pose and other arm balances are a goal for many of us as our yoga practice evolves. Arm balances like Bakasana represent strength, grace, and confidence. When those elements come together, the pose can look effortless and even weightless. It’s not surprising that so many people aspire to get off the ground. It literally takes your practice to a new level.
But that goal can be elusive for a number of reasons. The strength to lift yourself off the ground takes time and dedication. The balance to hold yourself steady requires patient practice and self-observation. And the confidence to do all of that only comes from a willingness to try and try again.
In the following post, we’ll be looking at all the elements involved in crow pose, from proper warmups and practice exercises, to finding your center of gravity and cultivating the necessary alignment. With patience and practice, you’ll be able to build your strength and body awareness so you can finally float above the ground and actually stay there!
As physical as crow pose can be, there is also a philosophical aspect to it. There are two notions from yogic philosophy that travel together and complement each other. Those are Shtira (stability) and Sukha (ease). To stand tall, a tree needs roots, just like a building needs a foundation to support it. A yoga pose is the same. You need to build a firm foundation and maintain that steadiness in order to create lift and lightness. The notion of stability and ease underpins your entire yoga practice and plays out in ways both physical and subtle, but for our discussion here, it’s absolutely essential for lifting yourself off the ground and staying there. Keep that in mind as you continue to explore arm balances. Stability and ease: Shtira and Sukha.
Another subtle aspect of arm balances is what’s known as Bhandas. Bhandas are energetic focal points along the length of your torso. Often translated as “locks,” (a term I find misleading, so I’ve moved away from it) they’re essentially areas of muscular engagement that allow you to create firm, balanced alignment. For our purposes, we’re going to focus on the Mula Bhanda at the base of your pelvis. Wherever this area aims, that’s where your energy goes. So, if you’re walking, that energy is pointing down and grounding you. If you’re going into an inversion, it’s pointing up and lifting you! Your hips are your center of gravity, whether you’re walking around on two feet or balancing on two hands, so the Mula Bhanda is key to getting into crow pose.
A simple exercise for Mula Bhanda engagement:
Lay on your back with your feet planted about hip width apart. Make whatever adjustments you need so your chin is neutral, your shoulders are comfortably grounded, you lower back is relaxed, and your hips are resting firmly on the ground.
Place your fingertips on your abdomen and close your eyes.
As you breathe smoothly in and out through your nose, feel how your abdomen rises and lowers with each inhale and exhale. Once that rhythm is established, begin to lengthen your exhales.
This lengthening will eventually require you to breathe out the remaining air a little more consciously. Your body naturally empties to a certain point. Here, you’re pressing out the remaining air more strongly. As you do that, bring your awareness to the sensations around your perineum, or pelvic floor. After a while, you may notice that the muscles of your pelvic floor firm and draw in as you breathe out completely. When you inhale, that area naturally relaxes.
Once you’ve felt that firmness, try engaging those muscles and hold that engagement while you continue to breathe normally.
You’ve now experienced what is called Mula Bhanda. That firmness in your pelvic floor is what will allow you to control your center of gravity as you start getting upside down!
Getting your body ready to go upside down:
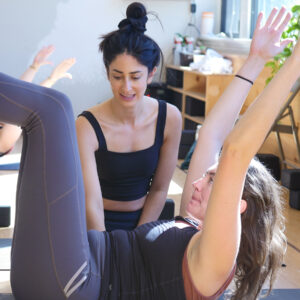
While you’re still laying down at ground level, reach for a yoga block. Start by laying on your back with your legs elevated and bent 90˚ at the knees, with your toes flexed back. Hold the block straight above you with straight arms, squeezing the block between your palms.
Now start to reach with the block towards your feet. Each exhale reaches towards your feet. Each inhale reaches towards the ceiling. Eventually, you’ll widen your knees and reach so actively with the block that you start to round your spine and reach a little further. You can only do this by engaging your abs strongly. Finally, reach, round, engage and hold that shape while you squeeze your knees in against your arms.
You’ve now tapped into the second component of holding crow pose: abdominal engagement and what is known as hollow body alignment. That slightly rounded body shape with firm abdominal engagement is an extremely strong shape for your body, and when you get upside down, it will allow you transfer your weight efficiently from your hands through your arms and shoulders, all the way up to your hips.
Warming up your wrists and arms:
With that, we’ve now highlighted the importance of your hips and abdomen in crow pose. So now, let’s shift our attention to our arms.
From the moment you learned to walk, your body has trained itself to walk upright. The muscles of your legs and hips have become incredibly powerful. Your brain automatically registers subtle shifts in balance and corrects them immediately. Everything you’ve learned up until now has taught you to stay right side up. Now we’re turning that all upside down!
Your hands, wrists and shoulders are designed for dexterity. They can move far more nimbly than your legs. But with that range of motion comes a certain lack of stability (remember “stability and ease”?) So, if we’re going to get upside down, we have to train our hands, wrists, and shoulders to hold that weight, and we need to treat them kindly.
Always start your inversion practice by warming up your wrists and shoulders. A simple and effective way to do that is to start on all fours. Being on hands and knees puts some weight, but not too much, on your wrists and shoulders. From there, you can begin a series of basic stretches: rock forward and back and side-to-side. Turn your hands in different directions, turn them upside down to stretch the backs of your wrists. Lift and lower your palms to warm up your fingers, wrists, and forearms.
Then you can come up to standing and slowly start to rotate your arms in broad, smooth movements to warm up your shoulders. Experiment and explore. And go slowly so you can really feel where you may be tight. Starting by warming up will pay off over time as your body strengthens with repeated practice. If you dive right in without warming up, you risk injuring yourself and setting back your progress for weeks at a time.
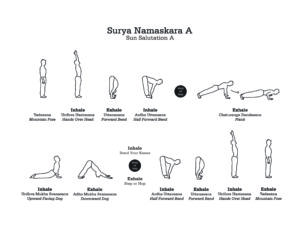
Do a few sun salutations:
The flexion and extension they bring to your spines, along with the shoulder and hamstring warmups are incredibly effective in getting your whole body ready for arm balances.
Learning to fly:
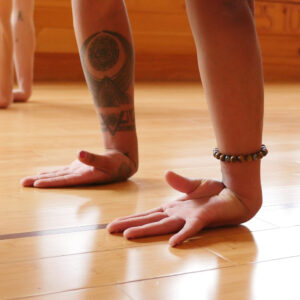
With your body warmed up for movement, reach for your block again. Place it halfway up your mat. Start by coming into downward dog. Pay special attention to how your hands are placed. You want them as wide as your outer shoulders with your pointer fingers aimed straight forward so the other fingers dial slightly out. Spread your fingers wide.
Now, start to walk forward from downward dog. As your stance shortens with each step, keep the weight in your hands, and your hips high. If your hamstrings are tight, keep your knees bent, but focus on keeping your hips as high as possible. Remember how we talked about Mula Bhanda pointing up to lift you? That’s what’s happening here.
The closer your feet come to your hands, the more you need to engage your abdomen to hold it all together. You’ll also need to grip the floor strongly with your fingers. I call this “tip and grip.” That action will allow you to hold to center when you get into crow. It’s a key technique in getting far enough forward to balance out the weight of your hips. Keep walking forward until you’re standing, on tip toes, on your block.
As challenging as this exercise is, it will train you to transfer the weight of your body from your hands, up through your hips, which are the highest point of your body. Repeat this several times and make it part of your regular arm balance practice. It will strengthen your body in all the right places (wrists, shoulders, abdomen, back) so you can get upside down more easily.
At this point, you’re ready to practice coming into crow pose. Position your hands approximately one forearm’s length forward of your blocks, and once again, have them as wide as your outer shoulders.
Begin walking your feet forward until they come up onto the block. Bend your knees and elbows till they meet. You want to bend your elbows back in space, rather than out to the sides. When your bent knees come into contact with your upper arms, squeeze in firmly to make a strong connection. Now you’ve got a good, stable foundation to lift onto. Keep your gaze slightly forward.
With both feet still on the block, tip your weight just an inch or so forward. You’ll feel your abdomen engage and your fingers grip the floor. That will allow you to lift one foot off the block. Do that a few times, alternately lifting one foot then the other.
Don’t wear yourself out. Once you start feeling fatigued, take a break, stand up and walk around. This is also a time for a mental break. Reflect on how it felt to shift your balance. If you noticed something promising, make note of that and try it again. By coming back after short breaks, you conserve your energy and your body and brain have a chance to register what you’re learning. This is what practice looks like.
Finally, when you’re feeling stable and confident with shifting your balance and maintaining muscular engagement, you’ll be able to lift both feet at the same time. If you tip back onto the block, dare to edge just an inch further forward. Often, that’s all that’s needed to find your center of gravity. If you’re scared of falling forward, lay a blanket out in front of you for padding. Eventually, the block (and blanket) can go away. Once the key components have become second nature, you’ll finally feel the strength, grace, and confidence to get airborne, and stay there!
That’s how you get into crow pose.
Focus on stability and ease. Focus on the lift in your hips (Mula Bhanda). Warm up your wrists, shoulders, and spine. Get familiar with strong abdominal engagement. Set up with a wide base and a block for extra height. And practice. Practice, practice, practice. My own inversions practice lasts from 15 to 45 minutes about 4 or 5 days a week. That means my wrists, shoulders and abdominal muscles are toned and used to that load. I’m not in a hurry when I practice. I train hard, but I don’t feel rushed. I try something, then I come out of it, take a break, and try it again. Over time, I make progress.
Yoga is a patient process. It’s through dedication over time that you get results. Enjoy the journey!
(Make sure to sign up for our email list and stay up-to-date with upcoming workshops! Just enter your email at the bottom of this page.)


